
Views in MS Project Pro
Contents:
Using the views in MS Project Pro
Information about your project can be displayed in different views. You can see the same information from different angles. MS Project Pro gives you the opportunity to look at the project from different angles.
Microsoft developers have created several views to make your work easier. Here are the main:
- Gant Chart - This view is used for scheduling tasks and tracking deadlines.
- Task Usage - This view is used to plan and track costs and work for each task.
- Resource Usage - This view is used to plan and track costs and work for each resource.
- Resource Sheet - This view is used for add and edit resources.
MS Project Pro has a lot of other view but these used for special analyse.
Steps to using views in MS Project Pro:
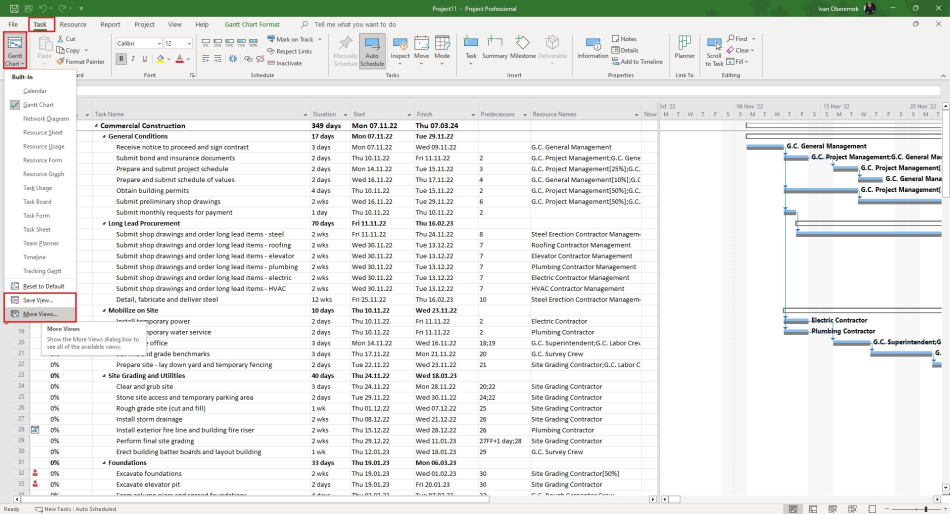
- Click the "Task" item of top menu.
- Click the bottom part of the "Gantt Chart" button.
- Click on the name of the desired view.
- If you change something in your views and want to return old customize. Click the "Reset to Default" button.
- You can using more views and you must click the "More Views ..." button.
- You can create your view in MS Project Pro. You must customize any views and click the "Save View ..." button in this menu.
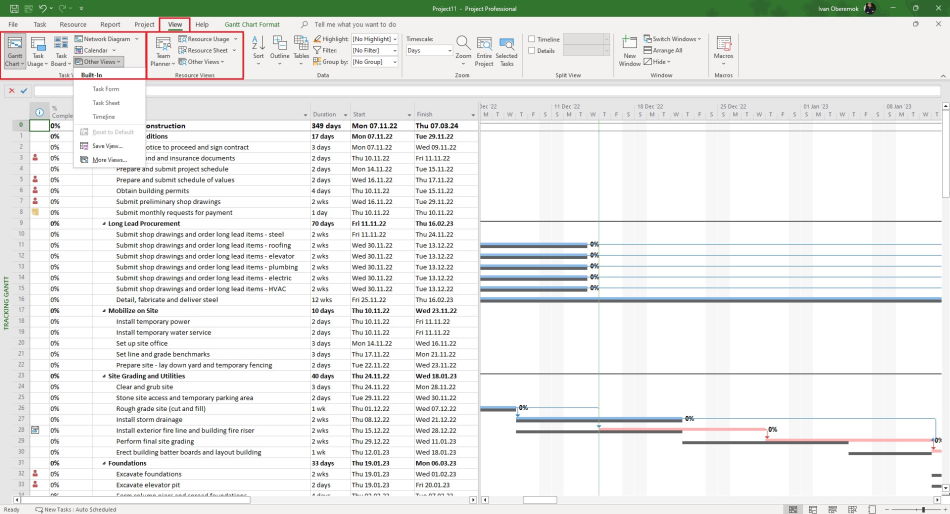
Second tool. Steps to using views in MS Project Pro:
- Click the "View" item of top menu.
- Select the view in the "Task Views" block and the "Resource Views" block.
- If you change something in your views and want to return old customize. Click the "Reset to Default" button.
- You can using more views and you must click the "More Views ..." button.
- You can create your view in MS Project Pro. You must customize any views and click the "Save View ..." button in this menu.
Creating the view in MS Project Pro
You can create your view in MS Project Pro. An easier way to create your own view is to customize any system view and save it. Once configured, click the "Save View..." button.
You can create two type of views:
- Singel view - one view of a certain type
- Combination view - combining from two different views.
Other way, you can copy any system view and customise it. Steps and and edit views in MS Project Pro:
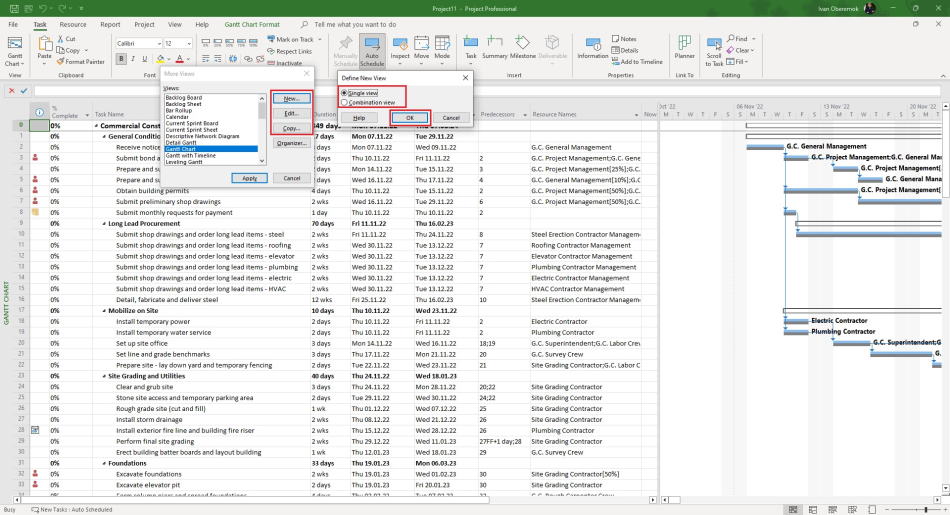
- Click the "More Views ..." button.
- If you want to copy the created view, choose the view and click the "Copy ..." button.
- If you want to change the created view, choose the view and click the "Edit ..." button.
- If you want to create a new view, click the "New ..." button.
- Choose the type of a view.
- Click the "Ok" button.
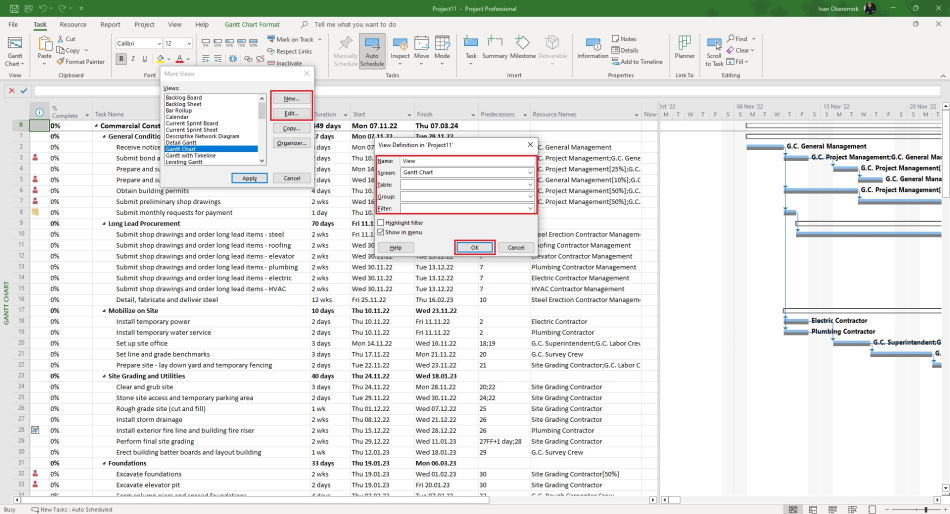
Steps to describe the new view in MS Project Pro:
- Enter the name of new view in the "Name:" field.
- Select type of left part of view in the "Screen:" field.
- Select the table in the "Table:" field. You must to select one item.
- Select the name of group in the "Group:" field. If you don't want to use the group, select the "No Group" item.
- Select the name of filer in the "Filter:" field. If you don't want to use the filter, selet the "All Tasks" item.
- If you want to use filter for highlight filter, click the "Highlight filter" box.
- If you want to show this item in the menu, click the "Show in menu" box.
- Click the "Ok" button.

Author: Ivan Oberemok
