
Custom columns in MS Planner

Contents:
Adding a custom column in MS Planner
Custom columns in Microsoft Planner are additional fields that can be created in a project task table. They allow you to store specific information that is not covered by standard fields such as “Task Name,” “Start,” “End,” “Assigned Resources,” and “Progress.”
Examples of custom columns:
- Task Type (e.g., administrative, technical, marketing).
- Client (if the project includes tasks for different clients).
- “Budget” or “Costs”.
- ‘Risks’ or “Priority”.
How to create a custom column in MS Planner:
- Go to the “Grid” view.
- Click on the “+ Add Column” column.
- In the window that opens, select “+ New Field”

4. In the window that opens, select the field type from the list: "Text," "Date," "Number," "Yes or No," or "Choice."
5. Add the column name in the "Field Name" field.
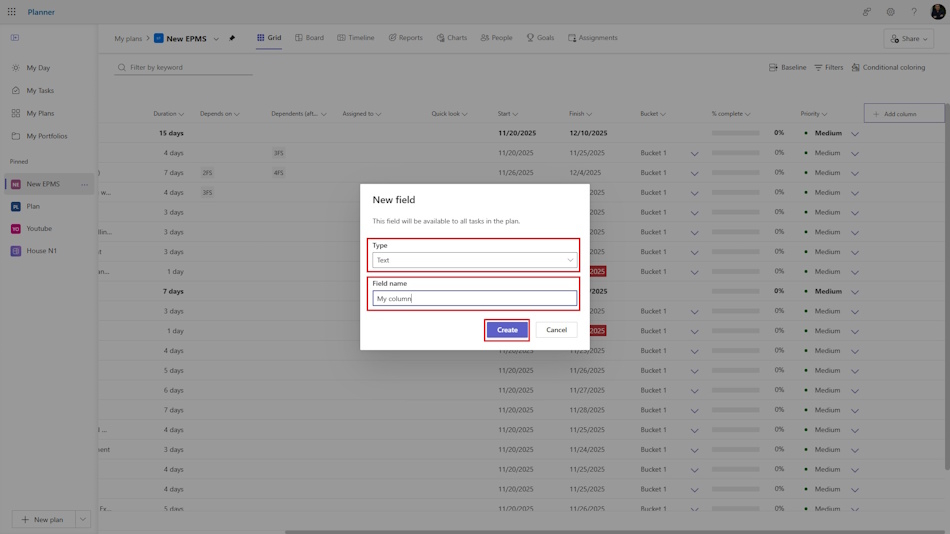
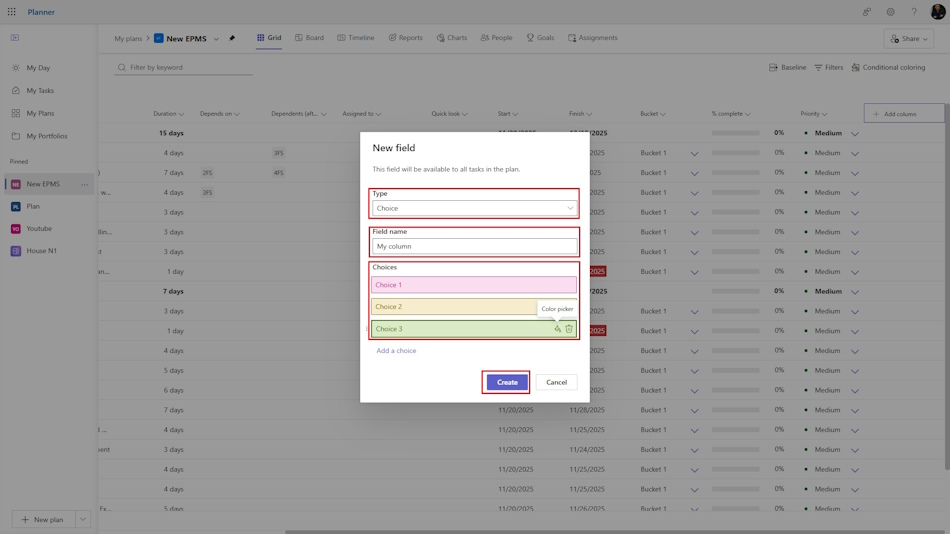
6. If you have selected the “Choices” field type, you need to add selection options.
7. If there are more than three selection options, click on the “Add choice” link.
Using a custom column in a view in MS Planner
After adding a column to the view, you must add a value for each task in the plan.
You can then set a filter for project tasks based on the field you created.
For example, you can add a field describing the risk level and select a list of tasks with different risk levels for analysis.


Author: Ivan Oberemok
