
Creating a project portfolio in MS Planner
Contents:
Creating a project portfolio in MS Planner
A project portfolio is an aggregated view of several plans grouped by meaning: by department, goal, project type, or initiative. It allows you to:
- Track the status of tasks and progress for each plan.
- See key performance indicators (KPIs) and deadlines.
- Make strategic conclusions based on the overall picture.
- In MS Planner, the “My Portfolio” tab appears for users with a Project Plan 3 or 5 license.
You can create a portfolio for yourself or for group work. Portfolios can be shared with groups, which simplifies collaboration:
- Managers see the big picture.
- Teams see their tasks in the context of the strategy.
- Analysts see the data for reporting.
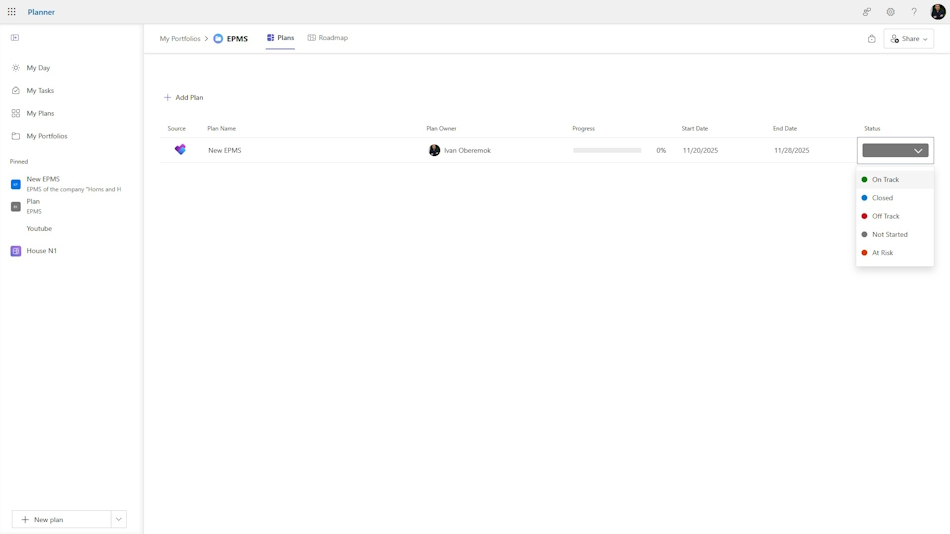
To create a new project portfolio:
- Go to the “My Portfolios” section in the left pane.
- Click “+ New portfolio”
- Enter a name and, if necessary, select the group with which you want to share the portfolio in the “Name” field.
- You can add the portfolio to a group.
- Click the “Create” button.
To grant access to a group:
- Go to the project portfolio.
- Click the “Share” button.
- In the “Invite participants” window, you can create a new group or connect an existing group.
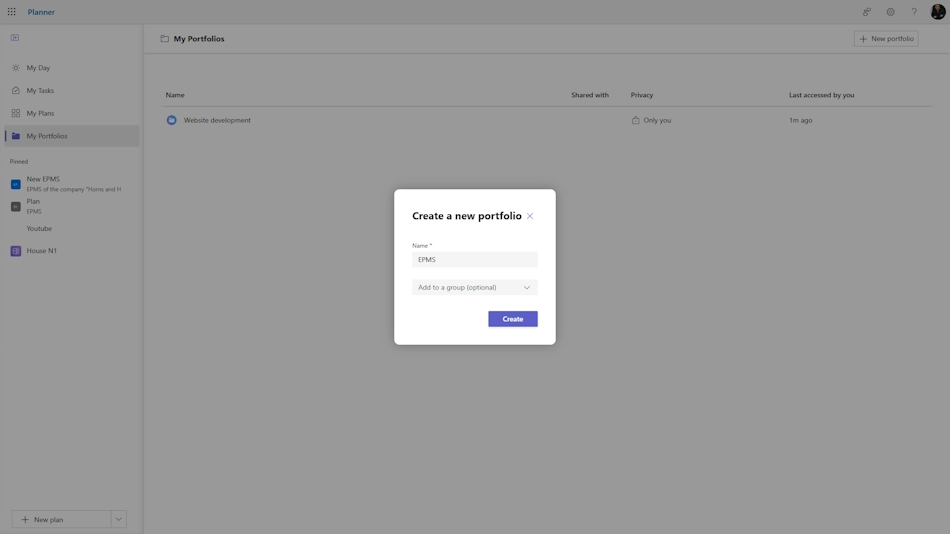
Adding projects to your portfolio in MS Planner
To add a project to your portfolio:
- Open the portfolio you created.
- Click the “+ Add plan” button.
- Select the desired plans from the list of available plans (premium plans only).
- Click the “Connect” button to link the plan to the portfolio.
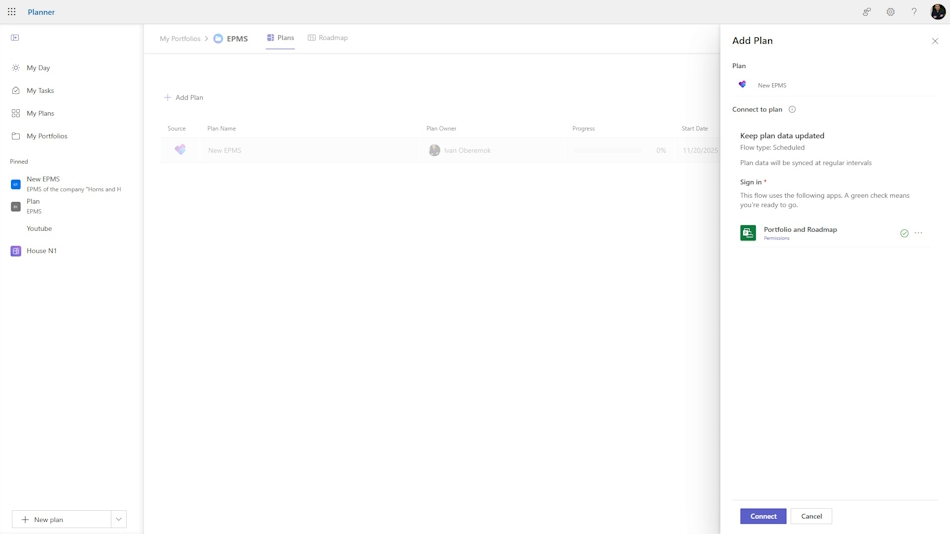
The project table contains the following columns:
- Project name.
- Project manager (project leader).
- Progress.
- Start date.
- End date.
- Status. You can set this field yourself.
#projectportfoliomanagement, #projectintegrationmanagement, #planningprocess, #msplanner, #oberemokii


Author: Ivan Oberemok
