
Assigning contractors to project tasks on MS Project Server
Contents:
- Creating a corporate column of contractors for tasks in MS Project Server
- Description of contractor tasks on MS Project Server
- Assigning contractors to project tasks on MS Project Server
- Assigning corporate contractors to project tasks in MS Project Pro
- Chat
Creating a corporate column of contractors for tasks in MS Project Server
When planning and managing projects with a large number of contractors, you need tools to keep track of them. You need to analyze contractors both within the project and when managing the portfolio. To do this, we can use a corporate column that describes the types of contractors.
To create a corporate column for tracking project contractors:
- Go to the server settings page. Click on “Server Settings” in the left menu.
- Click on the “Enterprise Custom Fields and Lookup Tables” link in the “Enterprise Data” block.
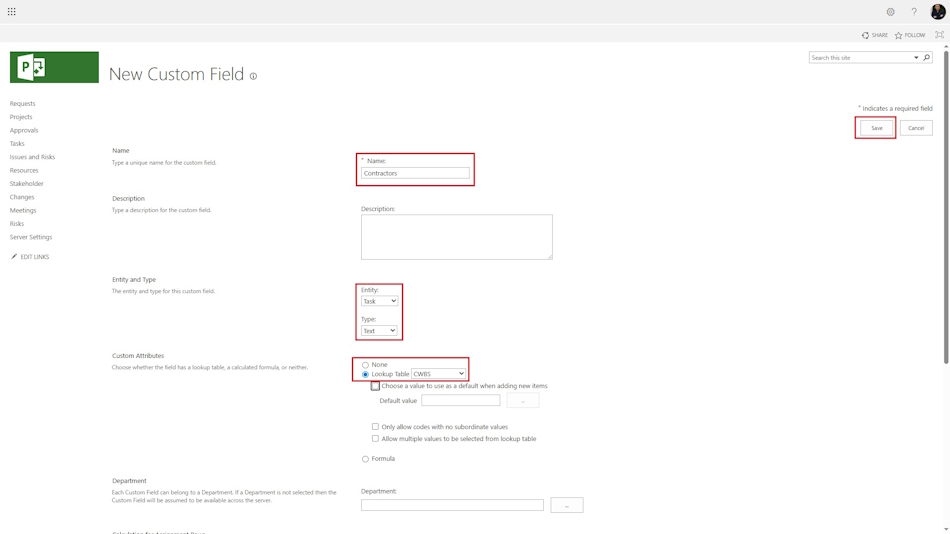
- Create a column with a list of contractor types. Click on the “New Lookup Table” button.
- Enter the name of the table in the “Name” field.
- Add a list of contractor types in the “Lookup Table” block.
- Create a new column. Click on the “New Field” button.
- Enter the column name in the “Name” field.
- Select “Task” in the “Entity” field and ‘Text’ in the “Type” field.
- In the “Custom Attributes” block, select “Lookup Table” and choose the table.
- To create the column, click the “Save” button.
Description of contractor tasks on MS Project Server
To use the contractors column for analysis, add it to the view. For example, we can add it to the “Task Schedule” view:
- Go to the “Server Settings” menu item.
- Go to “Manage View”
- Find the “Task Tracking” view in the “Manage View” table.
- In the “Edit View: Task Tracking” window, in the “Table and Fields” section, add the contracts field from the “Available fields:” list to the “Displayed fields” list.
- Save the created view.
Add contractor types to projects:
- Go to the project portfolio by clicking on “Projects”
- Select a project and open it.
- Open the project for editing.
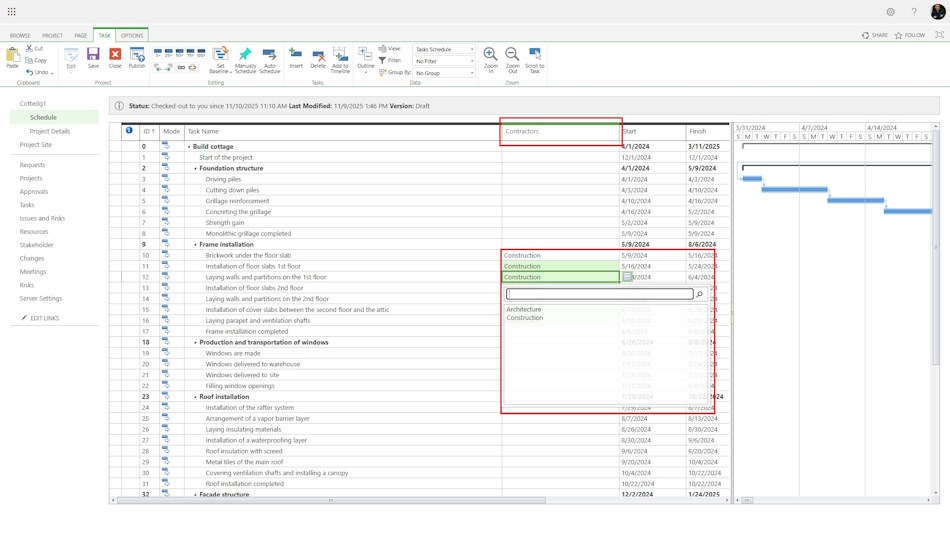
- Select the “Task Schedule” view.
- In the contractors column, select the name of the contractor types for the tasks.
- Publish and close the project.
To group contractors by field:
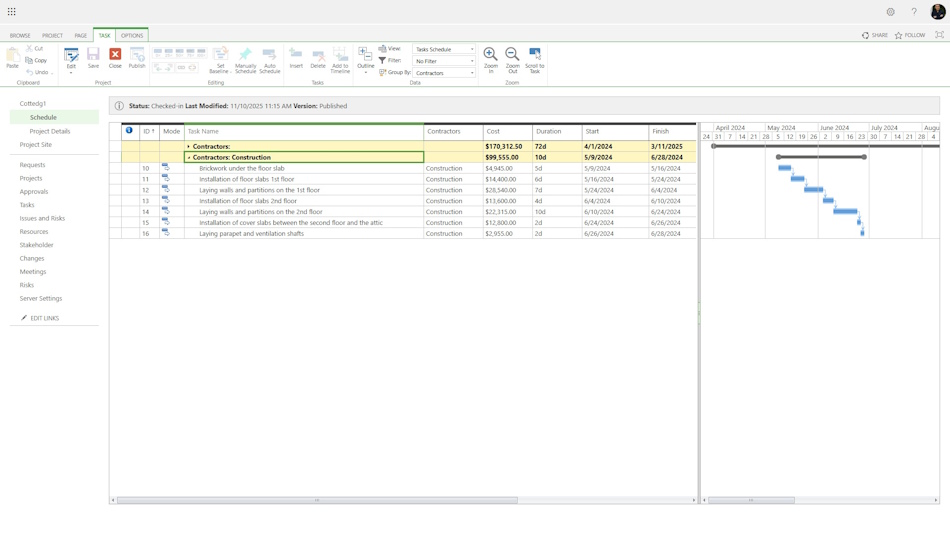
- Go to the “Task” menu.
- In the “Group” field, select your contractor field.
Now you can assign contractors and analyze their work on the project. For convenience, we recommend adding columns:
- Costs
- Duration
- Start
- End
Assigning contractors to project tasks on MS Project Server
Now, to assign contractors to task groups, you need to add contractors to the project and assign them to project tasks.
To add contractors to the project:
- Open the project.
- Select “Project” from the top menu tab.
- Click on the “Build Team” button.
- Select contractor resources on the left and click on the “Add” button.
- Click on the “Save and Close” button.
To assign contractors to tasks
- Open the project.
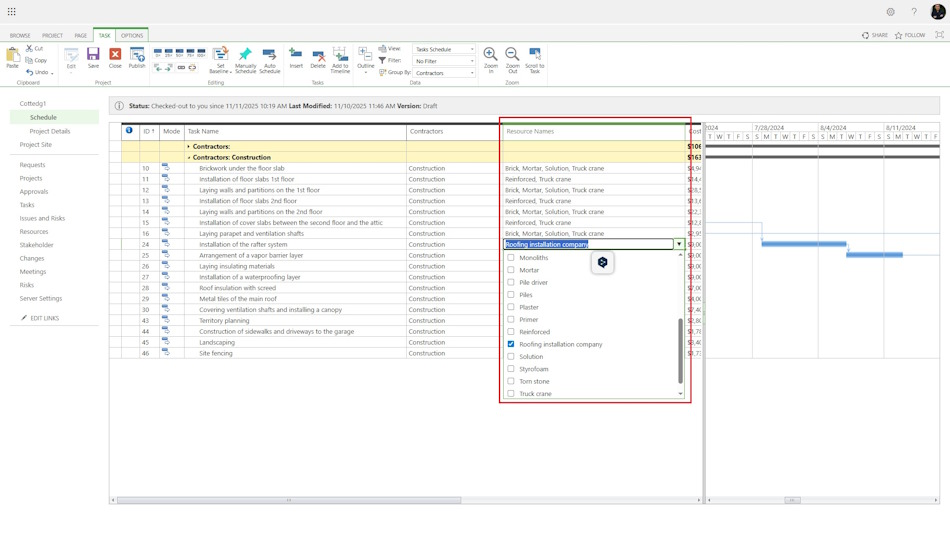
- Go to the “Task Schedule” view.
- Group tasks by the “Contractors” column.
- In the contractors column, select the contractor resource.
- Publish and close the project.
Assigning corporate contractors to project tasks in MS Project Pro
You can set contractor types for project tasks in MS Project Pro.
- Open the project in MS Project Pro.
- Go to the Gantt chart view.
- Add a corporate column for contractors.
- Set the required contractor types for tasks.
- Publish the project.
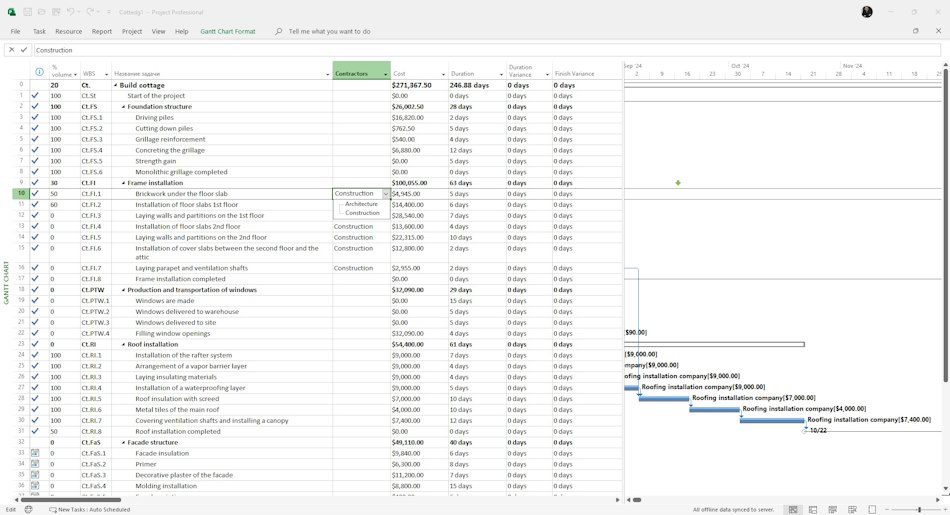
To assign resources, you need to add resources to the project and assign them to tasks in MS Project Pro.
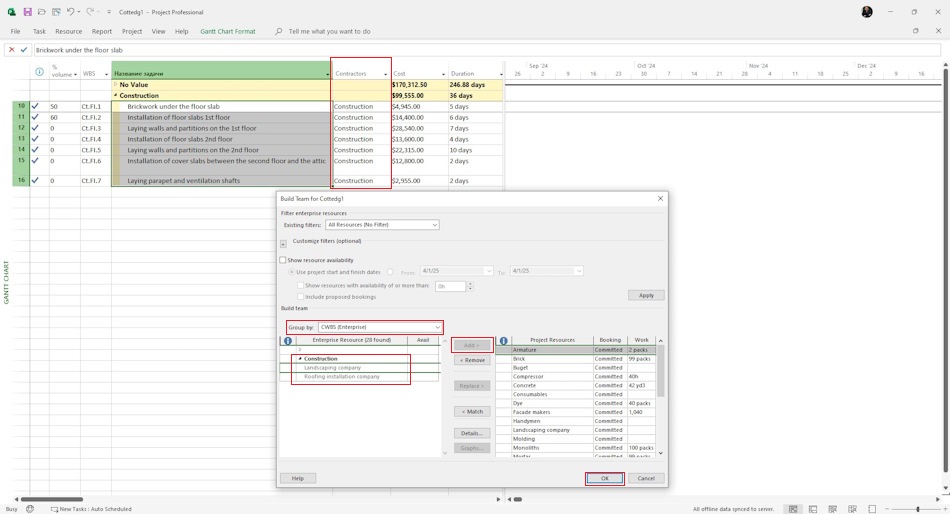
To add a corporate resource to a project:
- Open the list of corporate resources. Go to the “Resources” menu item, click on the “Add Resources” button, and then click on the “Build Team from Enterprise...” button.
- On the left side, select a corporate resource and click the “Add >” button.
To assign corporate resources
- Group project tasks by the value in the “Contractors” column.
- Close unassigned tasks.
- Select the desired tasks
- On the "Resources" tab, click the “Assign Resources” button
- Select the contractor's resources and click the “Assign” button

Author: Ivan Oberemok
