
Approvaling tasks in MS Project Server
Contents:
Approvaling tasks in MS Project Server
Steps to approval tasks in MS Project Server
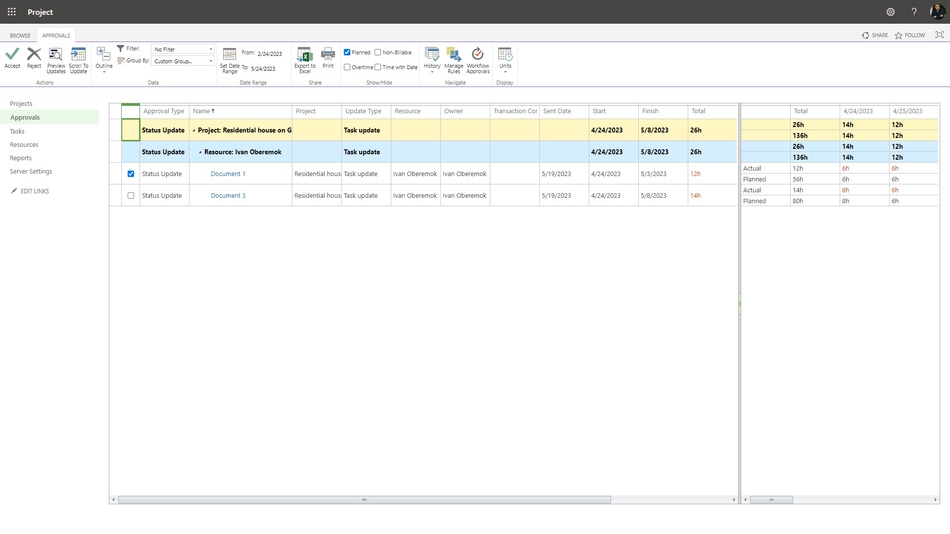
- Open MS Project Server.
- Click the "Approvals" item in the left menu.
- Click the "APPROVALS" item in the top menu.
- To accept a task, select task and click the "Accept" button in the "Actions" block.
- To reject a task, select task and click the "Reject" button in the "Actions" block.
- To show the preview updates, click the "Preview Updates" button in the "Actions" block.
- You can choose the outline, click the "Outline" button.
- You can set a filter in the "Filter:" field in the "Data" block.
- You can set a group in the "Group by:" field in the "Data" block.
- To choose the time period:
- Click the "Set Date Range" button.
- Enter the start date in the "From" field.
- Enter the end date in the "To" field.
- Click the "Ok" button.
- You can export tasks data to Excel. Click the "Export to Excel" button in the "Share" block.
- You can print tasks. Click the "Print" button in the "Share" block.
- You can show the plan work, click the "Planned" box in the "Show/Hide" block.
- You can show the owertime work, click the "Owertime" box in the "Show/Hide" block.
- You can show the non-billable work, click the "Non-Billable" box in the "Show/Hide" block.
- You can show the time, click the "Time with Date" box in the "Show/Hide" block.
- You can choose unit format, click the "Units" button in the "Display" block.
Previewing updates tasks in MS Project Server
Steps to preview updates tasks in MS Project Server:
- To change the zoom click the "Zoom In" button or the "Zoom Out" button in the "Navigate" block.
- To look for the task's bar click the "Scroll to Task" button.
- You can choose the outline, click the "Outline" button.
- Choose a view in the "View:" field in the "Data" block.
- You can set a filter in the "Filter:" field in the "Data" block.
- You can set a group in the "Group by:" field in the "Data" block.
- You can export tasks data to Excel. Click the "Export to Excel" button in the "Share" block.
- You can print tasks. Click the "Print" button in the "Share" block.

#projectportfoliomanagement, #projectscopemanagement, #executingprocess, #msprojectserver, #oberemokii

Author: Ivan Oberemok
