
Setting project lots in MS Project Server
Contents:
- Creating the lookup table to the enterprise lots custom field in MS Project Server
- Creating the enterprise lots custom field in MS Project Server
- Adding the enterprise lots custom field in MS Project Server
- Using the enterprise lots custom field in MS Project Server
- Chat
Creating the lookup table to the enterprise lots custom field in MS Project Server
You can create a column that allows you to group the different lots of the project.
Steps to the lookup table to the enterprise lots custom field in MS Project Server:
- Click the "Server Settings" item in the left menu.
- Click the "Enterprise Custom Fields and Lookup Tables" item in the "Enterprise Data" block.
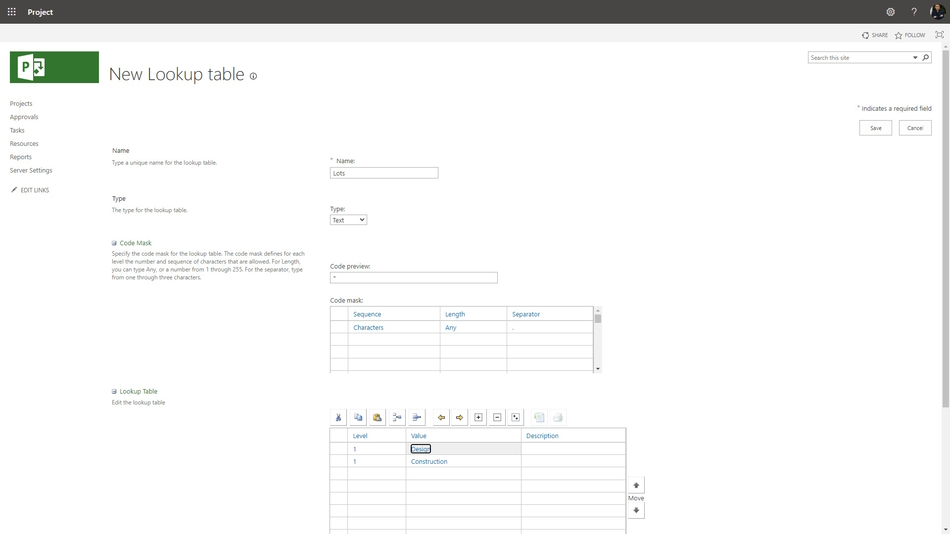
- To create the lookup table, click the "New Lookup Table" button.
- Enter the "Lots" in the "Name" field.
- Select the "Text" in the "Type" field.
- You can set multi level outline, add more values of the code mask table. Set up the code mask values:
- Set the type a separator.
- Set the length of level values.
- Set the character type for each level.
- Add vlues to the lookup table:
- Enter the table values in the "Value" column.
- If you want, you can add the description in the "Description" column.
- To save click the "Save" button.
Creating the enterprise lots custom field in MS Project Server
Steps to create the enterprise lots custom field in MS Project Server:
- Click the "Server Settings" item in the left menu.
- Click the "Enterprise Custom Fields and Lookup Tables" item in the "Enterprise Data" block.
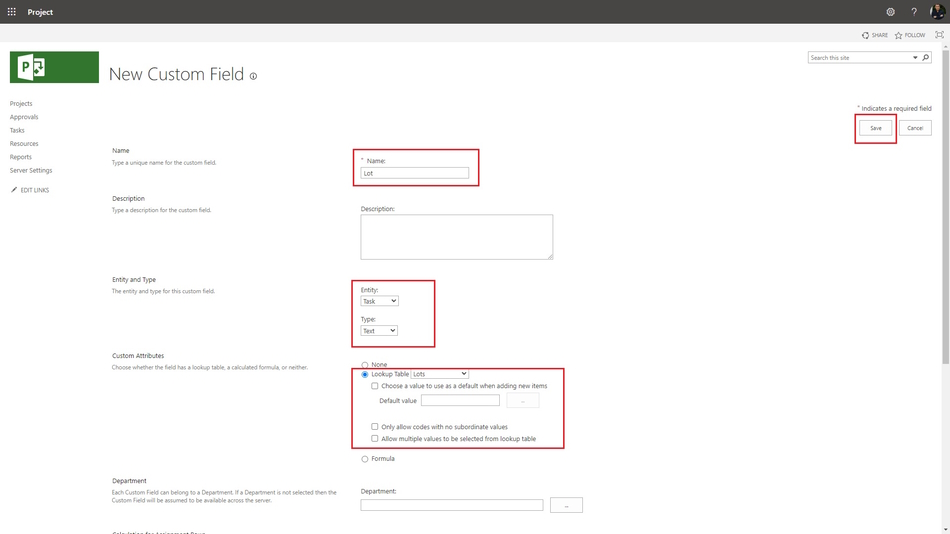
- To create the custom fields, click the "New Field" button.
- Enter the "Lot" in the "Name" field. The name must to be unic. You can use special symbols.
- Enter the field description in the "Description" field.
- Select the "Task" in the "Entity" field.
- Select the "Lookup Table" in the "Custom Attributes" block.
- Select the "Lots" table.
- If you want to use a default value:
- Click the "Choose a value to use as a default when adding new items" box.
- Select the default value.
- If you wnat to use multiple values, click the "Allow multiple values to be selected from lookup table" box.
- To save click the "Save" button.
Adding the enterprise lots custom field in MS Project Server
Steps to add the enterprise lots custom field in MS Project Server:
- Click the "Server Settings" item in the left menu.
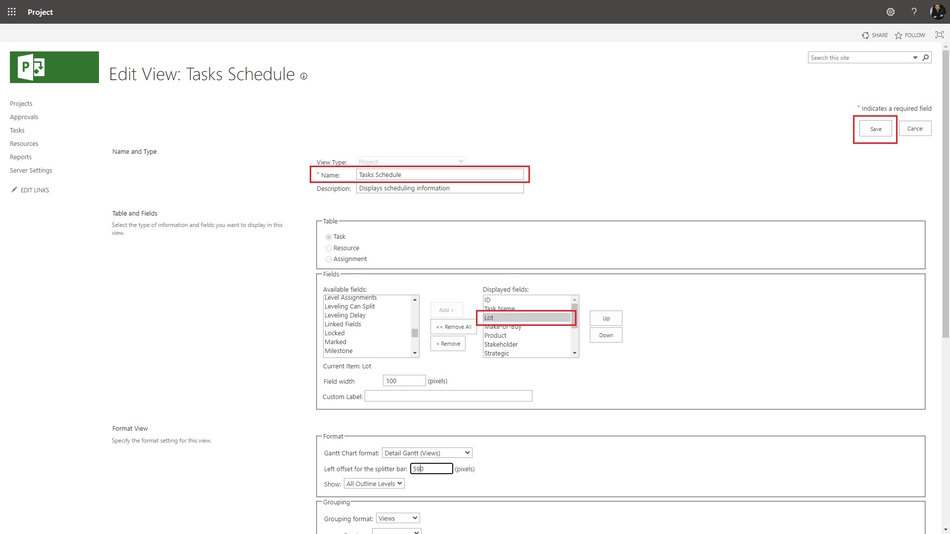
- Click the "Manage Views" item in the "Look and Feel" block.
- Click the "Tasks Schedule" view.
- Add the "Lot" in the "Fields" block.
- To save click the "Save" button.
Using the enterprise lots custom field in MS Project Server
Steps to use the enterprise lots custom field in MS Project Server:
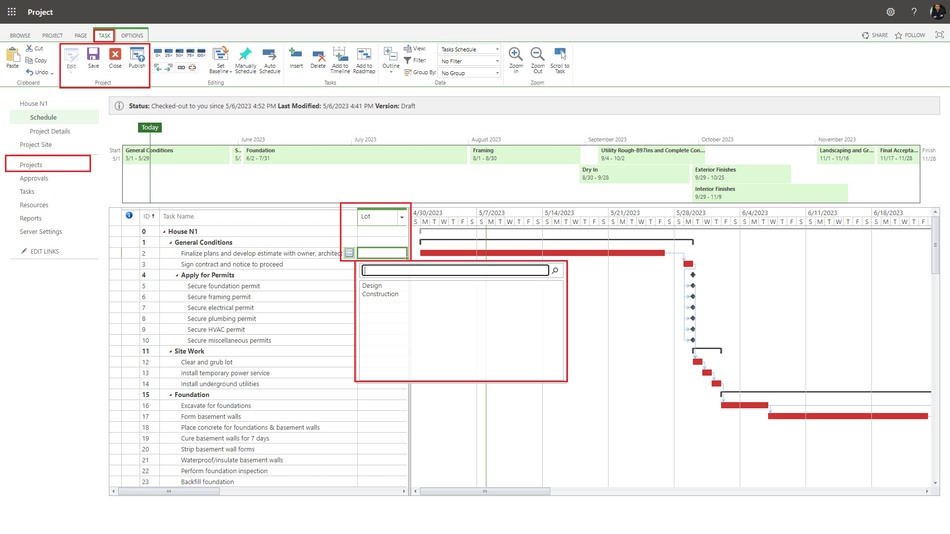
- Click the "Projects" item in the left menu.
- Select the project and click the project name.
- Click the "TASK" item in the top menu.
- Select the "Tasks Schedule" view in the "View" field in the "Data" block.
- Click the "Edit" button in the "Project" block and select the "In Browse" item.
- Choose stakeholder's name in the "Lot" field.
- To save click the "Save" button.
#projectportfoliomanagement, #projectprocurementmanagement, #initiatingprocess, #planningprocess, #msprojectserver, #oberemokii

Author: Ivan Oberemok
