
Project planning in MS SharePoint
Contents:
- Setting the project outline in MS SharePoint
- Setting links between project tasks in MS SharePoint
- Chat
Setting the project outline in MS SharePoint
Seteps to set up the project outline in in MS SharePoint:
- Open project schedule. Click the "Projects" item in the left menu. Click the project name.
- Click the "Tasks" item in the left menu.
- Click the "Gantt Chart" view name in the top.
- Add a new task.
- Select tasks in the table.
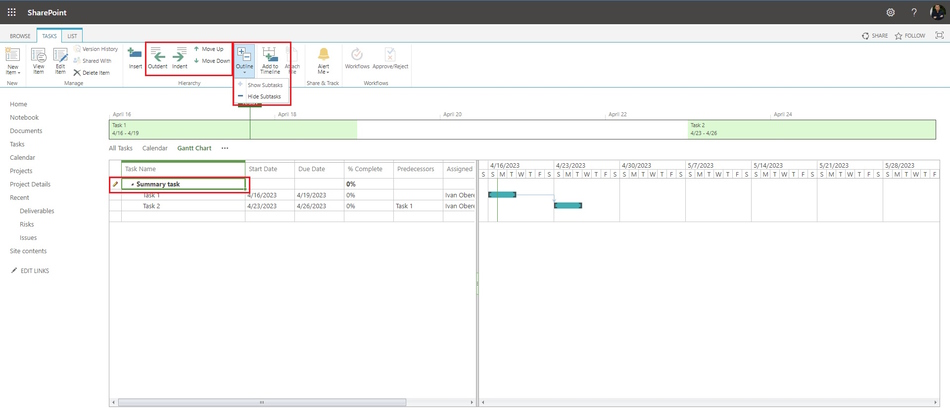
- Click the "TASK" item in the top menu.
- Click the "Indent" button or the "Outdent" button in the "Hierarchy" block.
- To move a task, select the task and click the "Move Up" button or the "Move Down" button in the "Hierarchy" block.
Setting links between project tasks in MS SharePoint
Steps to set up links between project tasks in MS SharePoint:
- Open project schedule. Click the "Projects" item in the left menu. Click the project name.
- Click the "Tasks" item in the left menu.
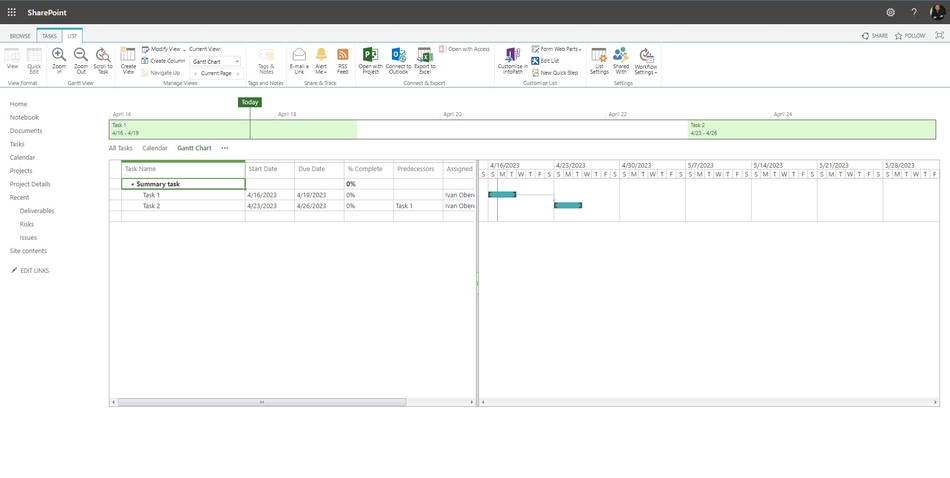
- Click the "Gantt Chart" view name in the top.
- Click the cell the task in the "Predecessors" column.
- Select the predecessor task.
Or
- Click the "All Tasks" view name in the top.
- Click the task name in the "Task Names" column.
- Select the task.
- Click the "TASKS" item in the top menu.
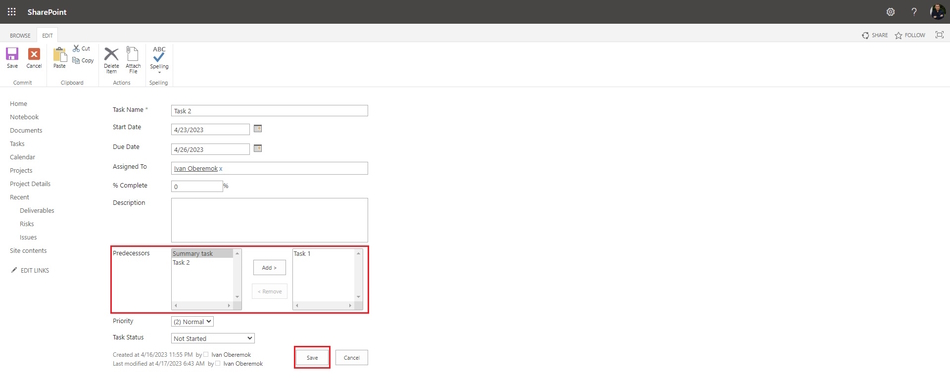
- Click the "Edit Item" item in the "Manage" block.
- Click the "SHOW MORE" link.
- Select the predecessor task in left block.
- Click the "Add >" button.
- To save click the "Save" button.
#projectmanagment, #projectschedulemanagement, #planningprocess, #mssharepoint, #oberemokii

Author: Ivan Oberemok
