
Setting up application view in MS SharePoint
Contents:
Creating applications columns in MS SharePoint
The first step to customizing the application view is creating columns.
Steps to create applications columns in MS SharePoint:
- Open the application.
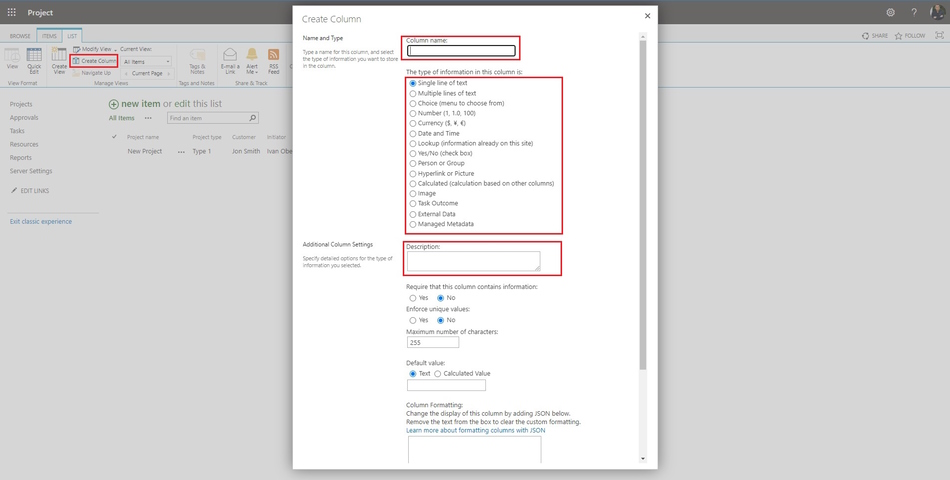
- Click the "Create column" item in the top menu.
- Enter the column name in the "Column name" field.
- Select the column type:
- Slngel lines of text - Text with a set of any characters of limited length.
- Multipli lines of text - Text in multiple lines
- Choice (menu to choose from) - List of values. With the ability to select one value.
- Number (1, 1.0, 100) - Any number.
- Currency ($, ¥, €) - Column where you can store the value of currencies.
- Date and Time - Column where you can set the date and/or time.
- Lookup (information already on this site) - Column where you can select a value from other applications.
- Yes/No (check box) - Column where only two values can be set "Yes" or "No".
- Person or Group - Column where you can select a user or group of users.
- Hyperlink or Picture - Column for storing links to pages and pictures.
- Calculated (calculation based on other columns) - Column for storing calculated values.
- Image - Column for storing one picture.
- You can add the description column in the "Description" field.
- You can require the user to add information to this column. The user cannot save the information otherwise. Click the "Yes" in the "Require that this column contains information:" block.
- Force the user to enter unique information. Click the "Yes" in the "Enforce unique values:" block.
- You can set the number of characters in the "Maximum number of characters:" field.
- You can set the default value in the "Default value" field.
- For save click the "OK" button
Second tool to create applications columns in MS SharePoint:
- Open the application.
- Click the "List" item in the top menu.
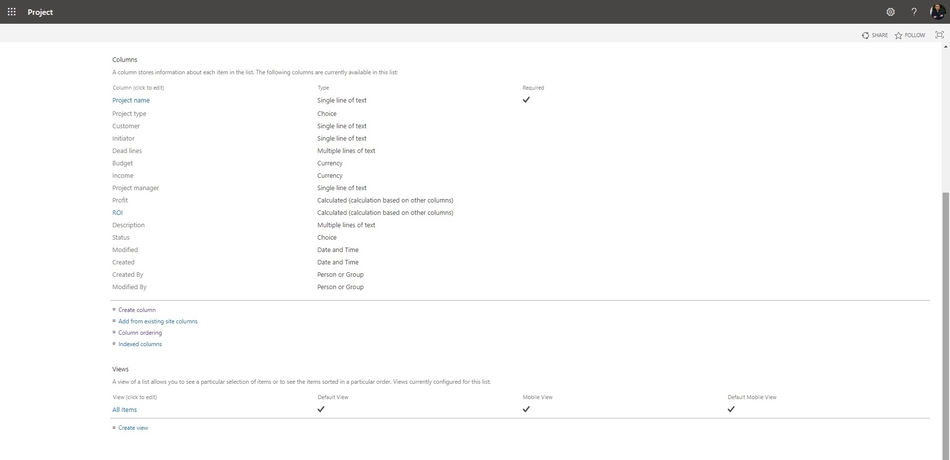
- Click the "List setting" button in the "Settings" block.
- Click the "Create column" link.
- You can add columns from other application. Click the "Add from existing site columns" link.
- You can set the order columns, click the "Column ordering" link.
- If you want to edit the column, click the column name. You can't change the column type.
Creating applications views in MS SharePoint
Steps to create applications views in MS SharePoint:
- Open the application.
- Click the "List" item in the top menu.
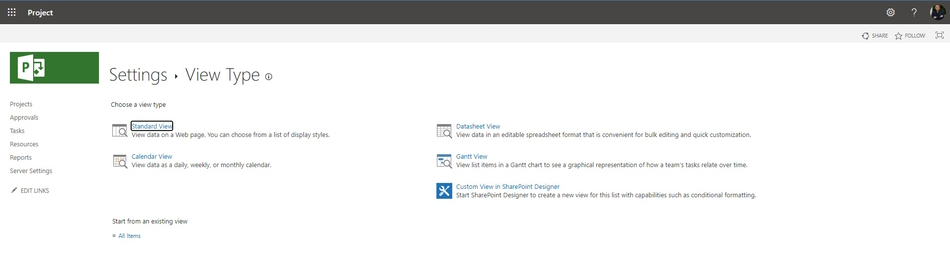
- Click the "Create View" button in the "Manage Views" block.
- Select the view type:
- Standard View - all data is presented as a list.
- Calendar View - all data is represented by a set of tasks in the calendar.
- Datasheet View - all data is presented in the form of a table with the possibility of free editing.
- Gantt View - All data is presented as a set of tasks on a gantt chart.
- You can create view start from an existing view in the "Start from an existing view" block.
Steps to customize application views in MS SharePoint:
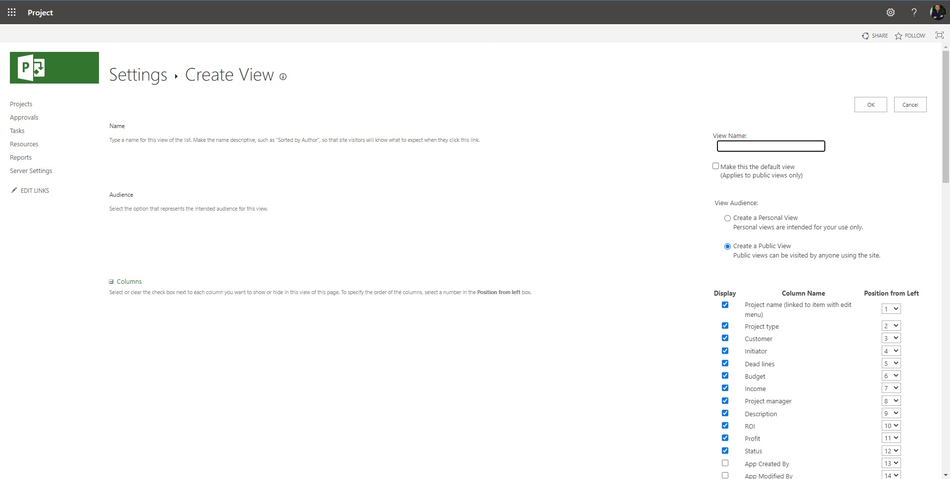
- Enter the view name in the "View Name:" field.
- You can make this default view for the application, click the "Make this the default view" box.
- You can create personal view, click the "Create a Personal View" box. This view can use only you.
- Select columns, click boxs near column names.
- Set the column order in the "Position from Left" column.
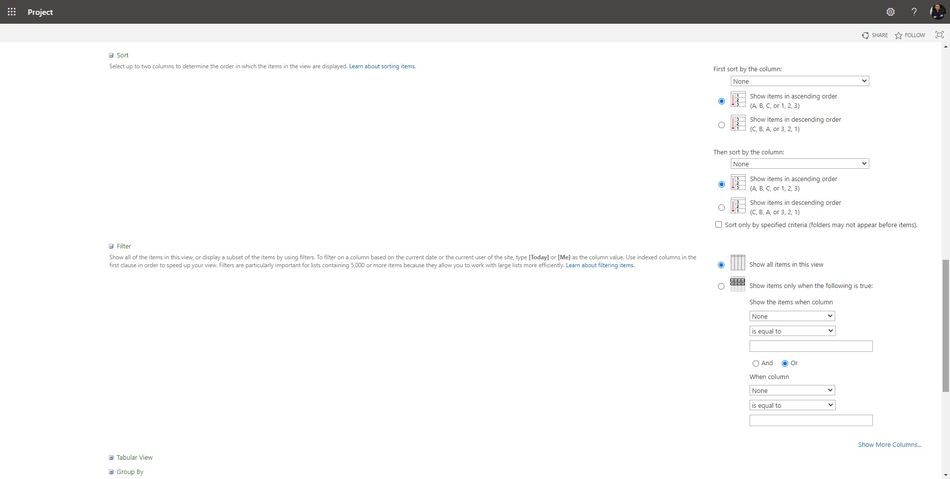
Steps to customize application views in MS SharePoint (continuation):
- Select the column for sort in the "Sort" block.
- Set the filter in the "Filter" block:
- Select the column for filtered.
- Select the filter condition.
- Enter the filter value.
- Select the column for group in the "Group by" block.
- Set the column totals calculation in the "Totals" block.
- Select the style in the "Style" block.
#mssharepoint, #oberemokii, #projectmanagment, #projectintegrationmanagement, #initiatingprocess

Author: Ivan Oberemok
