
Project baseline in MS Project Pro
Contents:
Set project baseline in MS Project Pro
You can save each intermediate version of the plan. Then compare the plan changes with the new data. The project has a main and intermediate plans. You can compare the current plan with the main and intermediate. You can save plans approved by the management.
Steps to set project baseline in MS Project Pro
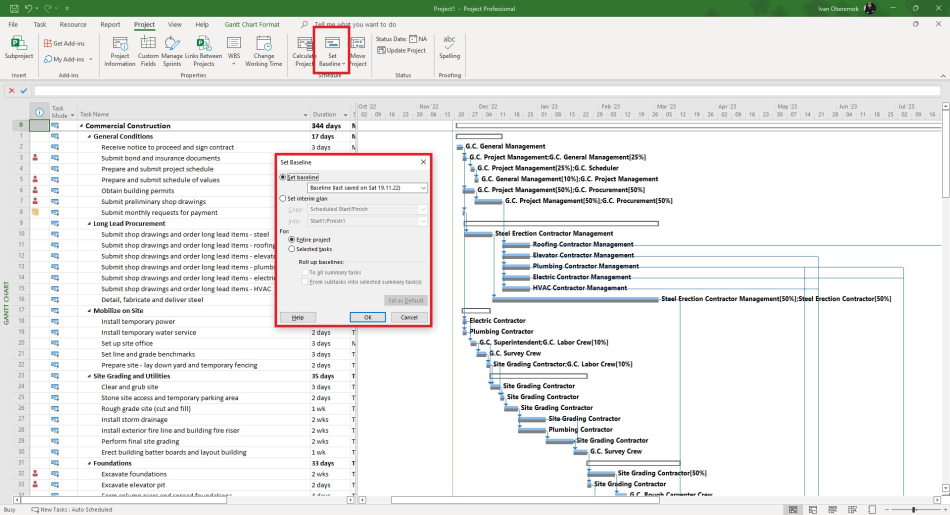
- Click the "Set baseline" on the "Project" tab, in the "Schedule" group.
- Click the item "Set Baseline...".
- You can save the eleven baseline use the "Set baseline" field. Select the name of baseline. The baseline "Baseline" is a main.
- You can set baseline for select tasks. You must select tasks in the table and click on the "Select tasks" button.
- You select all subtasks If you chech the "From subtasks into selected summary task(s)" box.
- You can set a baseline for all summary tasks if you check the "For all summary tasks" box.
- Click the "Ok" button
Steps to set interim project baseline in MS Project Pro
- Click the "Set baseline" on the "Project" tab, in the "Schedule" group.
- Click the item "Set Baseline...".
- Click the "Set interim plan"
- Select the name of main baseline in "Copy:" field
- Select the name of interim baseline in "Into:" field
- Click the "Ok" button
Clear project baseline in MS Project Pro
Steps to delete project baseline in MS Project Pro
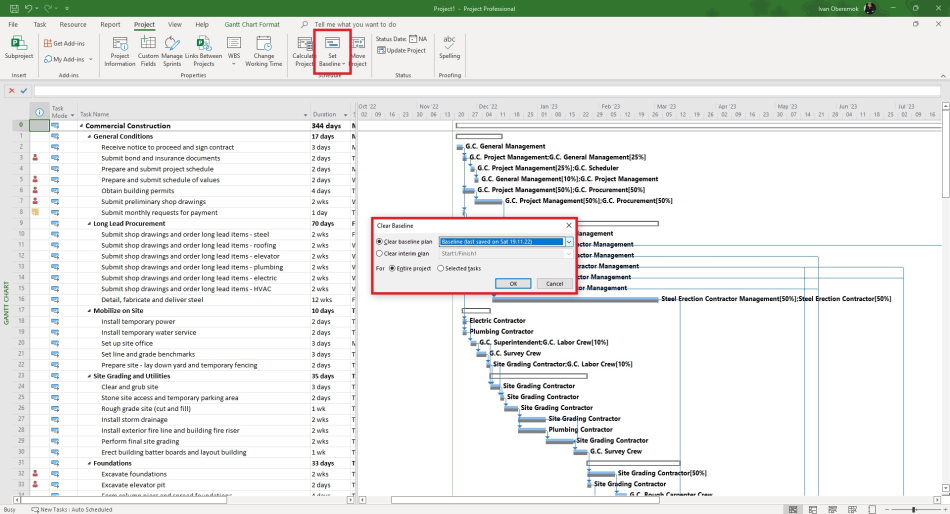
- Click the "Set baseline" on the "Project" tab, in the "Schedule" group.
- Click the item "Clear Baseline".
- Click the "Set interim plan"
- Select the name of main baseline in "Clear baseline plan" field or you can select the name of interim baseline in "Clear interim plan" field.
- You can select entire project or selected tasks in the "For" field.
- Click the "Ok" button
#msprojectpro, #oberemokii, #projectmanagment, #projectschedulemanagement, #planningprocess

Author: Ivan Oberemok
